Showing posts with label organizing. Show all posts

Sunday, April 10, 2011

{Project: Cord and Charger Organizer}

Simplification is a beautiful thing. I swear it can add
years to your life.

I put a kibosh to a source of daily annoyance and stress
in our house when I put all our cords, plugs and chargers
in one spot.

No more trying to remember what ones were in which
drawer, bag or room. Glorious order.

It cost less than seven bucks (source) and took only a
few minutes to turn an over-the-door shoe organizer
into a home for those items.

I hang it on the inside of our coat jacket closet door so
it's out of sight but near all our doings. It seemed like
a practical place for a few other things, too -- external
hard drives, my flip camera, extra keys, etc.

I only put stuff in there we actually use. Decluttering was part of my mission to simplify.


Lindsay gave me this idea. She made a beautiful version of it when she and Michael
lived in Arizona. I thought the clear pockets would work better for us though. I like
that I can just glance at it and grab what I need without thinking about it.

I did this sometime last year, but it still gets a lot of ooo's and ahhh's when people
realize what it's for. So, I thought I'd share it here.

If only every corner of my house were so well intentioned. :)

Sunday, April 03, 2011

{Hard Copies}

You -- if you're like most people in the 21st century -- probably have way more digital
photos then you have printed ones.

I was right there with ya. But it occurred to me, I put a lot of effort into documenting and
trying to get good shots. Those photos shouldn't be buried in a external hard drive or
electronic folders that are only ever seen by me. They're part of our memories and our
story. I wanted to be able to physically flip through hard copies.

So, I made a goal for myself to get photos printed and put into albums during the month
of March. Progress has been made! I ordered a ton of 4x6 prints -- over 800 -- from
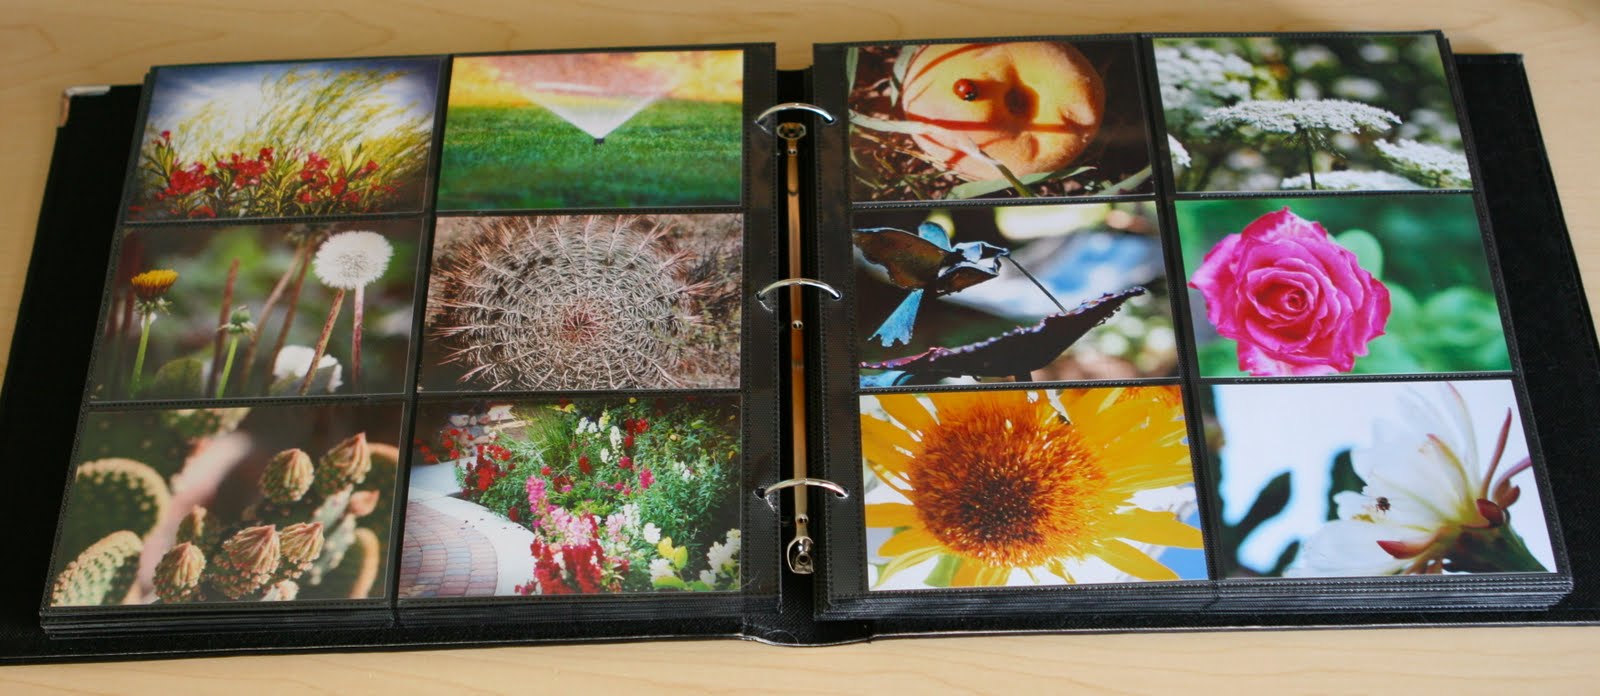
pictures I took primarily in 2009 and 2010. Then, I put them in this album ($13 at
Walgreens). It has space for 500 4x6 photos.


Look at all these glorious pages filled with actual pictures! This album contains 475
photos, in all. (I left spaces in it to create titles and make notes.)


To keep it easy on the eyes, I made sure the photos on each page were either all
horizontal or all vertical.


Pretty much each page or set of pages has it's own topic. I had to do a little counting and
preplanning to accomplish that. It gives the album a sense of organization. And I tried to
get a good variety too -- events, people, pets, and artistic snapshots, etc.


Finally, I was able to use up a bunch of letters and stickers in my stash by making simple
titles on some of the pages.


This album is 100% complete. (I'm so pumped about that, and I've looked through it well
over a dozen times.) I've started a second one that has 199 pictures in it, and it's ready for
more. I still have to do the title inserts and notes in this book. I'm hoping to actually keep
up with photos as I go in 2011.

Thanks for stopping by today and checking out my little project!

Friday, December 10, 2010

{Project: Organize the Garage}

I bring good news and bad news to my key board as I sit down to share our latest
organization project.

The good news: We finally got to organizing and beautifying our garage after a year
of talking about it, and we love the finished product.

The bad news: I didn't take a proper before photo. I mean, what am I new?
I meant to ... I said I wanted to ... and then somehow we got started without taking one.

So, I'm pulling a couple shots out of my archives to give you an idea of the BEFORE.


This is what the garage looked like before on a good day ... here it is in 2007, shortly after
we moved in and got everything into place. Four years and several purchases and home
improvement projects later, it was not nearly this orderly.

Now, onto the our organizational undertaking! First, we emptied the entire garage into
the back yard so we'd have a fresh canvas with which to work.


This was the perfect opportunity to part with things we didn't need. We made piles
for trash and donation and got ride of a ton of junk! Then, David cleaned the walls,
baseboards and floor.


Everything dried overnight. The next day was paint day. We did it all in the same color.
The dingy flat, builder-grade white paint got covered with a higher gloss, thick coat of tan.


The floor is what we were really excited about. We got a quote to have it professionally
epoxied, but it was so expensive. We just couldn't justify spending that kind of money,
especially because this isn't our forever house. So, we went the DIY route, and it was
such a good call. One trip to Home Depot and a few minutes of Q&A with Richard in
the paint department, and we came home with this.
The application process was totally easy. It worked out really well to have two people
to do it -- one to paint and one to sprinkle the chips. You have to work kind of fast so
the chips get applied to the epoxy while it's still wet because that's what makes them
stay in place. I told David I want to do this to every garage we every own for the rest
of our lives. It looks so nice, clean and finished.

I also called around for estimates on getting cabinets installed. We ended up going with
Space Solutions. Their prices were competitive, the service was great, and they had it
installed a week or two after we placed our order.


I love how these hide all the little odds and ends that used to be in plain sight. The best part about the cabinets though? We created a locker for David in one of the areas. He really
needed a spot for his things (running, golf, softball, weights, etc.), and now he has one.

I also designated a spot by the door for:
* Items to be donated
* Plastic bags that can be taken to the grocery store for recycling

I am in love with this new space. I'll be doing this or something like it to any house I live
in for the rest of my days! The best part was doing it with D over a long weekend. We had
a lot of fun together. :)

Tuesday, September 14, 2010

{Project: Organize the Pantry}

I don't think it's a coincidence that organization and orgasm start with the same letters.

My plan was for big improvement and clean, eye pleasing, maintainable pantry organization.
Achieved! For me, physical clutter creates mental clutter. While clean, orderly spaces
promote balance and clarity. Reorganizing my pantry space was one of my goals for August.
I'm just now getting around to posting photos. I hope you enjoy!

Before and after:

Now, for a closer look:

First, I shopped for a few new items ...
(1) Brother P-Touch home office label maker. Marked down to $20 from $40!
(2) Cereal containers at IKEA
(5) Turntables, both one and two tier (BBB)
(6) Bins to hold over flow items (BBB

Then, I prepped ...
I took everything out of the pantry, cleaned and filled the new containers, put cooking
direction cut-outs on the bottom of some items, and printed labels.


Finally, I gave all of it a home in the pantry ...


Glorious organization! I feel so much more clear and focused when I look in the pantry now.
It's easier to figure out what I have, don't have and would like to buy because everything is
easy to see. I've already noticed that I buy less when grocery shopping because I know I
have plenty of things to work with at home. This system also gives me a way to store the
stuff I buy in bulk so I don't have loose bags cluttering up my pantry shelves. (We repurpose
the bags for yard cleanup.) It's an uncomplicated, balanced, happy space that leaves me
feeling inspired, calm and ready to prepare good, healthy food. I absolutely love it!

Thanks for stopping by. :)

Tuesday, August 24, 2010

{Project: Purse Organization Solution}


I stumbled upon an organization idea for my purses that solved a long time storage issue,
and I love it. Since I got a lot of excited feedback on the jewelry organization idea posted
earlier, I thought I'd share this one, too.

My purses have long-lived in the spot designated for them in the top shelf of my office closet.
I liked the idea of having them out of sight and all in one location, but getting them in and out
was always a hassle. The whole short-girl, high-shelf dynamic didn't work and was made
worse by my insistence to hold onto too many purses, including ones I don't even use
anymore. They'd get tangled up and pulling things in and out of the space was stressful.

Not anymore! First, I thinned them out -- getting rid of a half a dozen older, cheaper and
out of style purses. Next, I repurposed a wine rack that came in our buffet. It fits like a
glove in the top shelf of my closet and each compartment makes the perfect sized nook for
a purse or two. Now each one has their own space, they don't get tangled together, it's easy
to slide them in and out, and I can see what's where with total organized clarity. I love it!

The photos don't do this org project justice. (It's a tricky height and angle to reach with the
camera.) Hopefully it's clear enough and you're able to get the idea ... shelf, wine rack, purses,
organization!


What at-home projects are you working on these days? Have you found a home
organization solution that really works for you? If so, I'd love to hear about it.

Tuesday, July 27, 2010

{Project: An Organization Idea for the Ladies}

My brain is happy when things are in their place. This was not the situation with my jewelry.

I've never been a fan of having my jewelry out. I like it tucked away so the rest of my
surfaces are cleared of clutter. The problem with my plan was that the area where I had
everything tucked was not working. Yes, that is a Tupperware container with a paper
towel in it. Classy.

It was time to change up the mess I was calling a jewelry box. I had a few nice boxes, but
they didn't have enough compartments to keep things from getting tangled together, and
they didn't fit into the space I had set aside for them. After considering about ten different
options, I went from this ...


... to these plastic storage craft containers. (You can find them at JoAnn's & Michael's.) I
bought two sizes and put a layer of padded liner in each nook. Now, every piece of jewelry
I own is separated, protected, organised, in place, and orderly. Each category of jewelry (bracelets, big necklaces, earrings) has it's own box. It feels so much better to me! I also
love that the lids snap closed, keeping the insides dog hair and dust free.


On the down side: It is a lot of plastic, and it's not very feminine or pretty.
I've managed to justify all of that because of how clean and organized it feels
and how well it works. Now, I just need to break out my silver cleaner and
get everything polished and shiny. :)

TIP: If you do this at your house, buy an extra plastic storage contain or two. That way,
as you add jewelry to your collection, you'll have plenty of matching storage to grow into.

Another TIP: A reader commented with a great suggestion ... Even if you don't use this
idea at home, one of these containers might make a great jewelry holder for your travels.